


Manage DNS Records
Before You Begin
- Confirm which nameservers are authoritative for the domain.
- Copy the current DNS records before making changes.
- Have the exact host/name, record type, value, priority and TTL required by the destination service.
Step by step:
1.Login to your account.
2.Click on the domain name in "My Products"
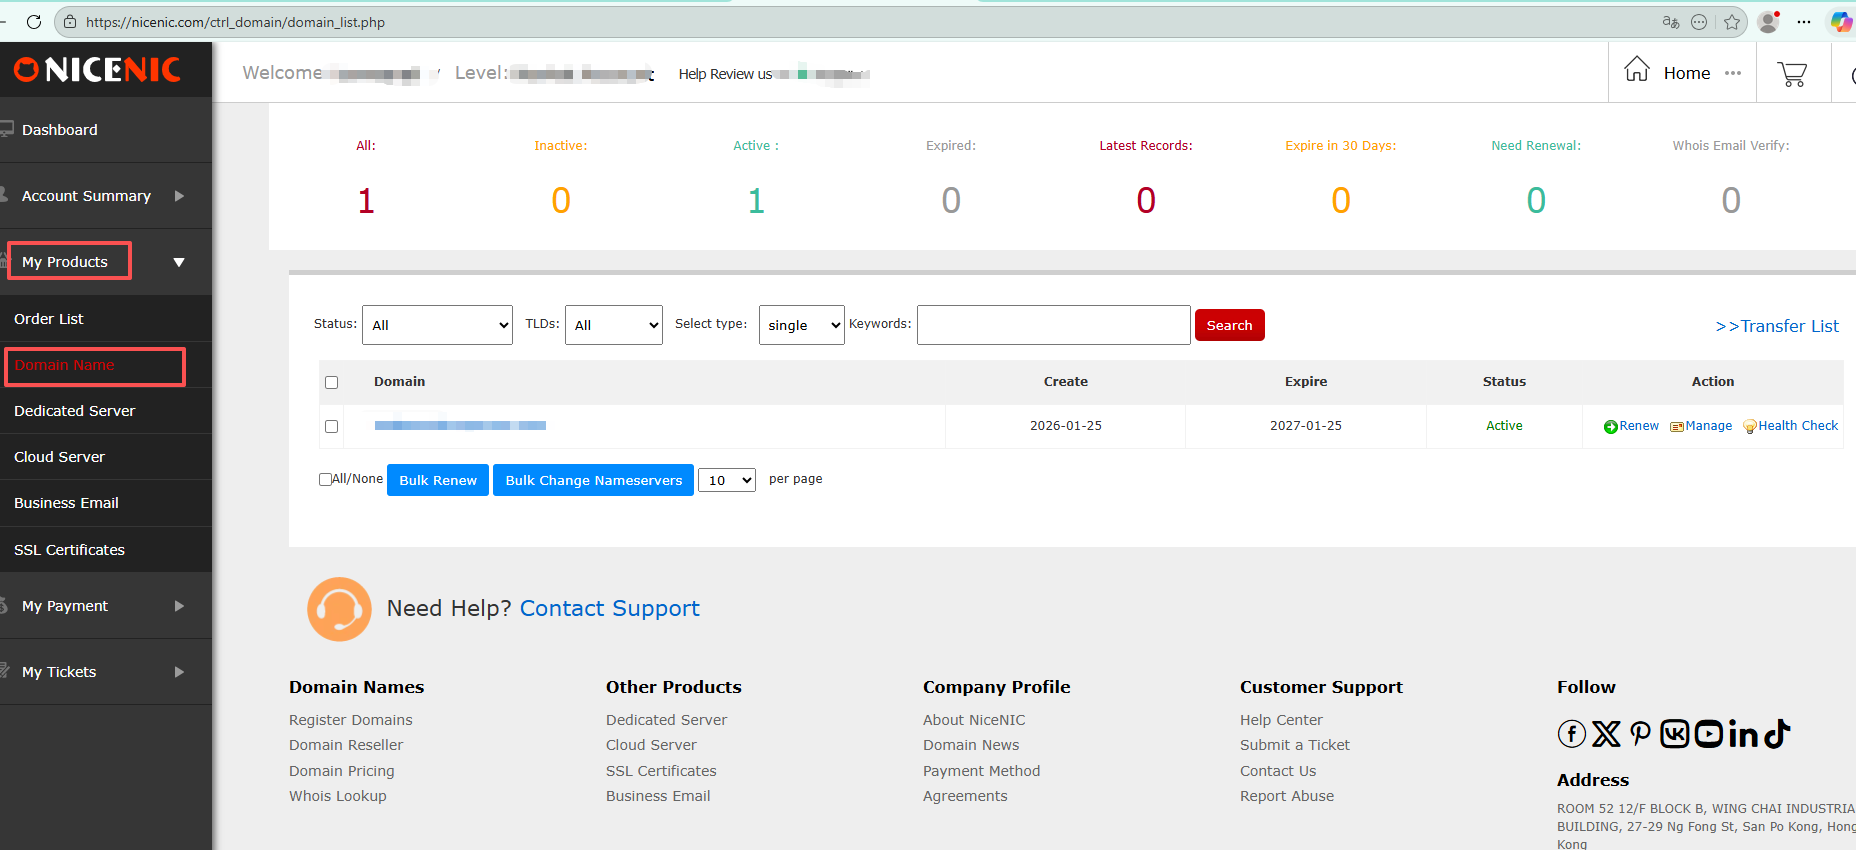
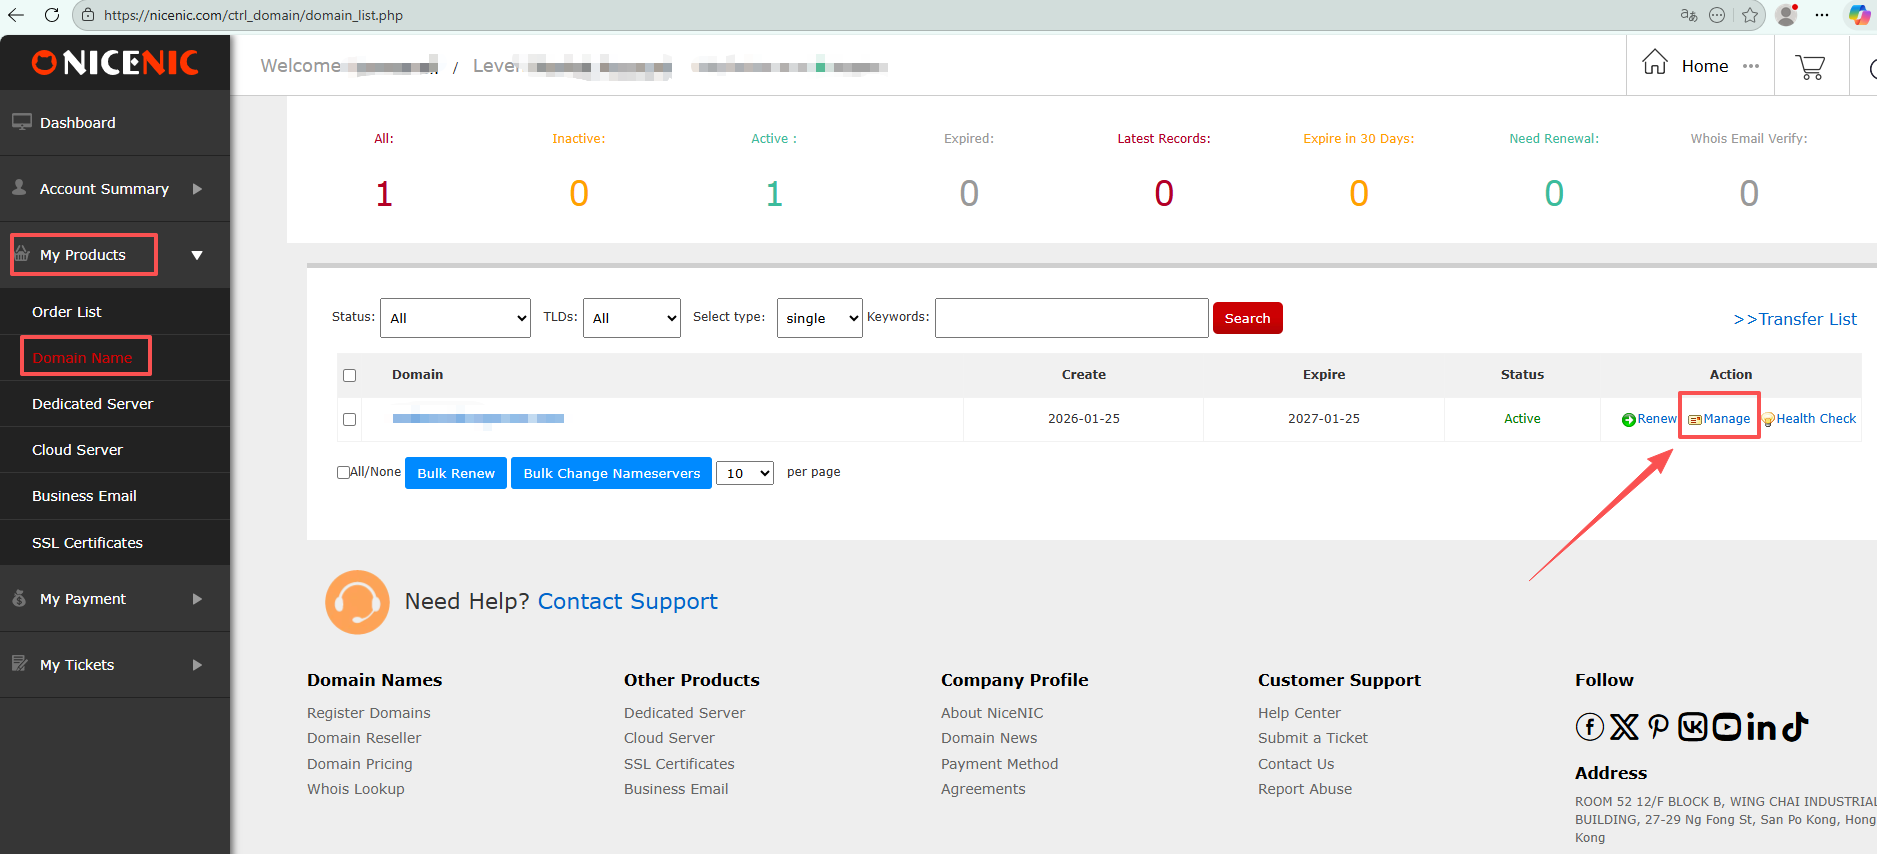
3.Click the domain name you wish to modify the DNS records for.
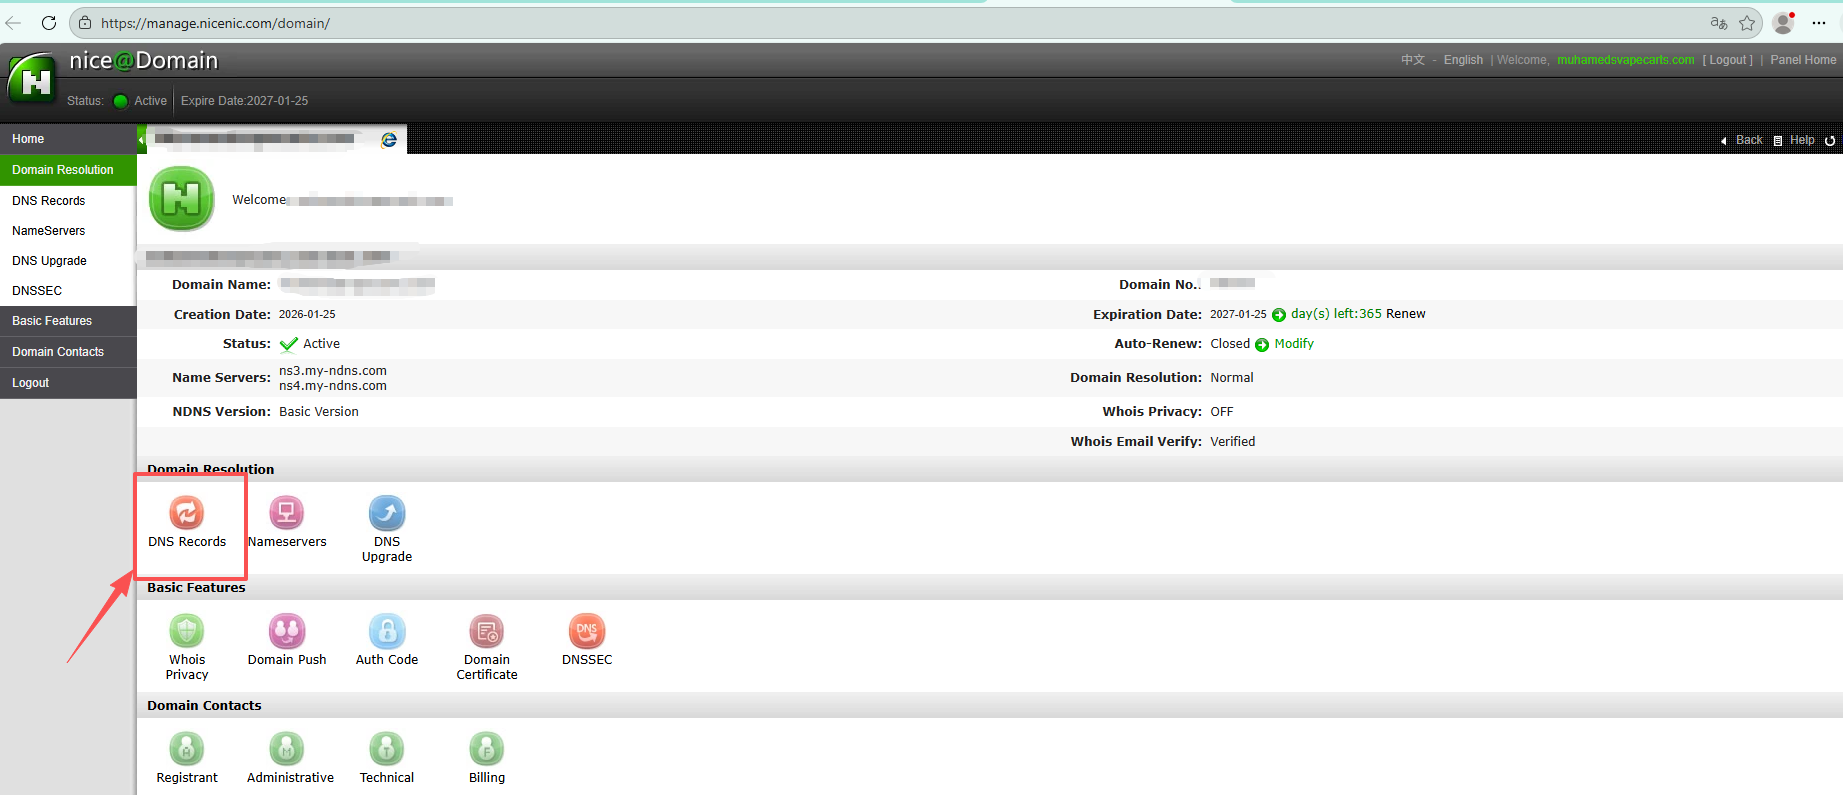
4. Click "DNS records"
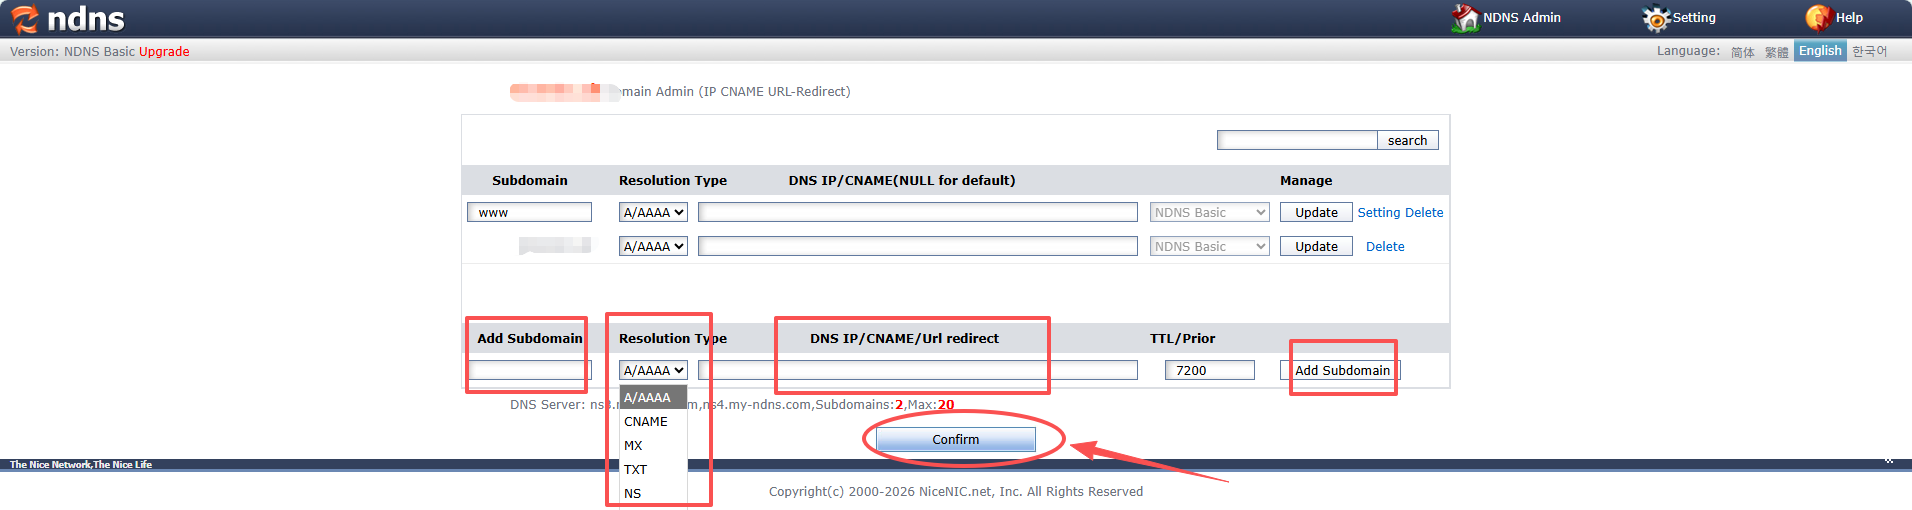
5.Add your desired DNS records
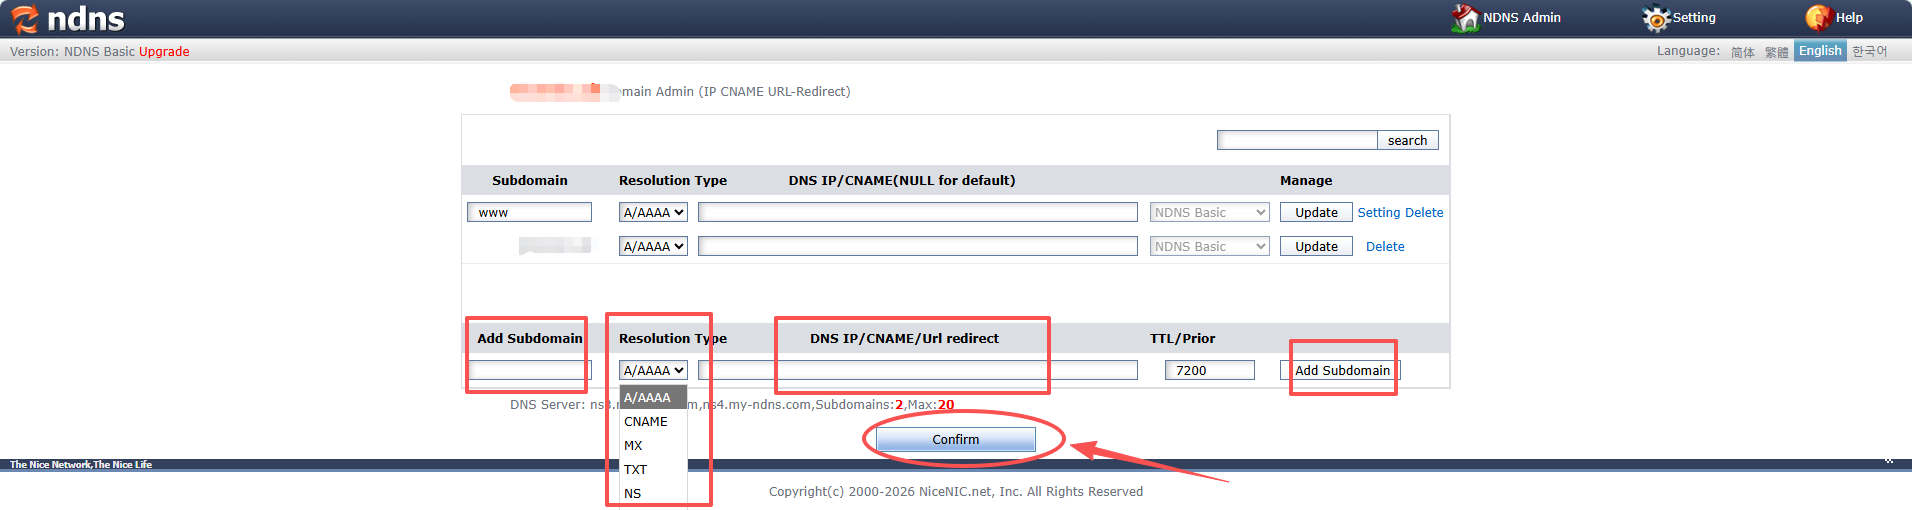
1) Click on the leftmost column to add a subdomain
2) Select the resolution type in the second column
3) Fill in the DNS IP/CNAME/Url redirection in the third column
4) Click on the rightmost column to add a subdomain
5) Finally, click the "Confirm" button at the bottom to save the DNS settings
A/AAAA record, also called IP address record modify.
Warm reminder: Do not include your full domain name in the subdomain field.
For example, if you want to create sub.yourdomain.com, simply enter "sub" in the Subdomain field.
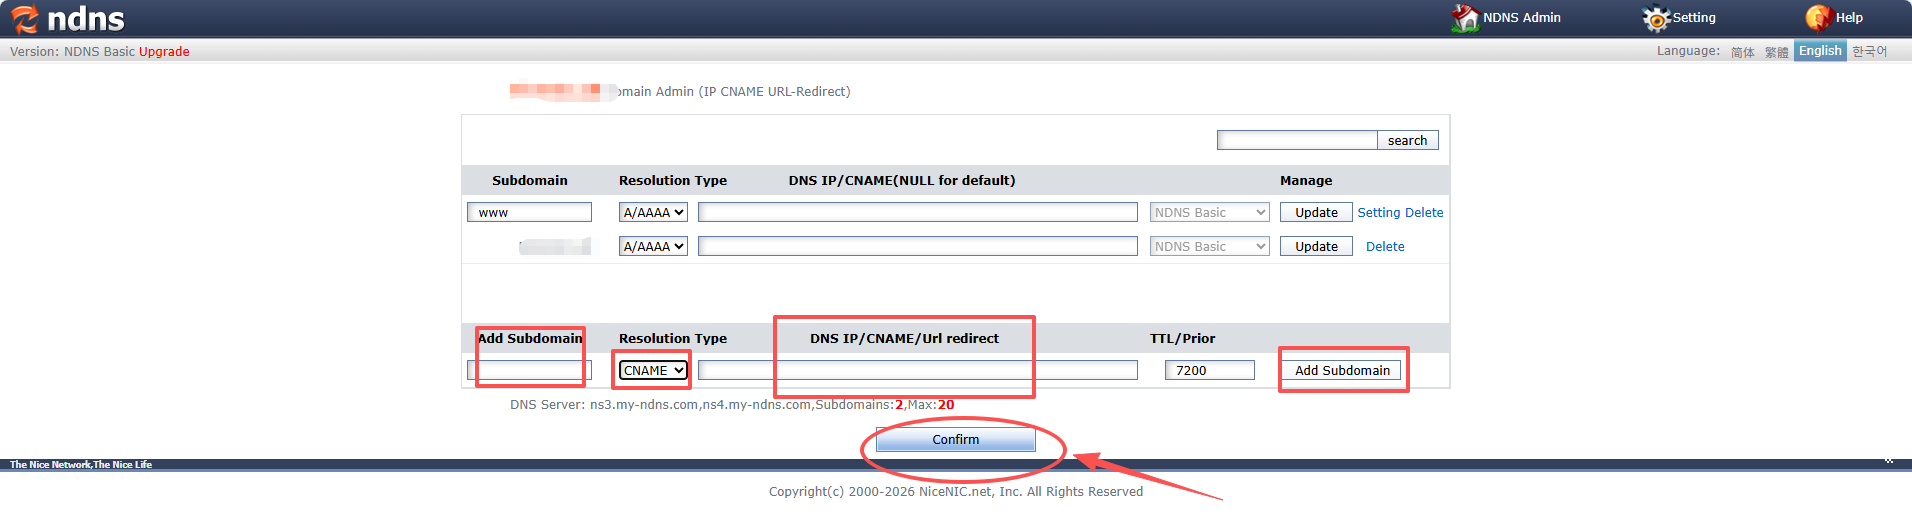
CNAME record,also called Alias record modify
Example:
Subdomain: blog
Type: CNAME
Value: yourdomain.com
This means when someone visits blog.yourdomain.com, they will be directed to yourdomain.com
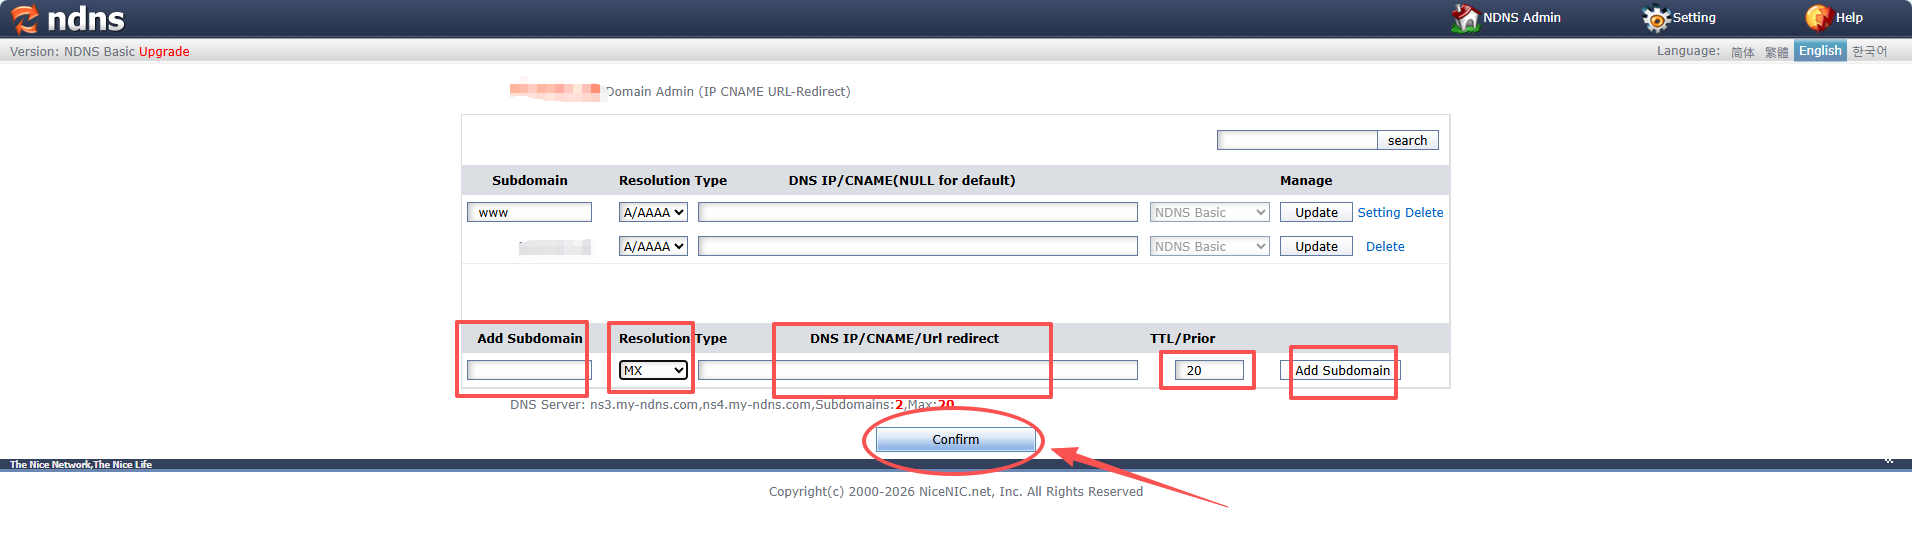
MX record, also called mail routing record modify
Example:
Type: MX
Priority: 10 (The priority helps to determine which mail server to use if multiple exist)
Value: mx.youremailserver.com
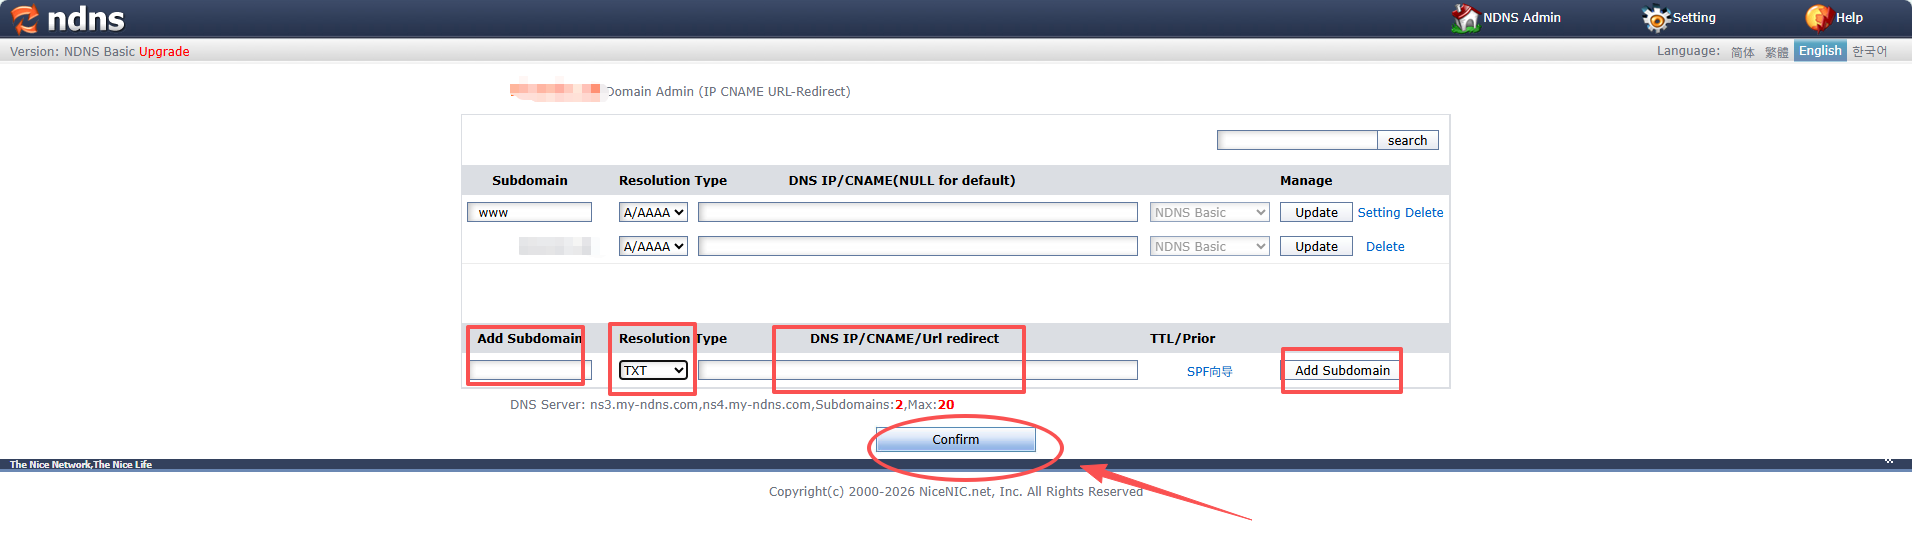
TXT record modify
Example:
Type: TXT
Value: "v=spf1 include:_spf.youremailserver.com ~all"
Related NiceNIC Guides
- How to Back Up DNS Records Before Changing Domain Settings
- How to Change Nameservers Safely
- How to Check DNS Propagation
- Why Your DNS Changes Are Not Working And How to Fix It
If the issue continues after you complete the checks above, submit a NiceNIC support ticket with the affected domain or product, the exact error message, the time of the issue and the troubleshooting already completed.


- Domain Names
- Registering Domains
- Domain Reseller
- Domain API
- Whois Lookup
- Our Products
- Dedicated Server
- Cloud Server
- SSL Certificates
- Business Email
- Company Profile
- About NiceNIC
- Domain News
- Payment Method
- Legal | Disclosure Requests
- Customer Support
- Help Center
- Submit a Ticket
- Contact Us
- Report Abuse
