


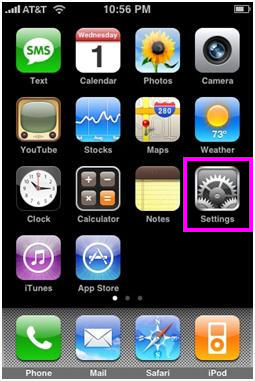
1. From the Dashboard, click Settings.
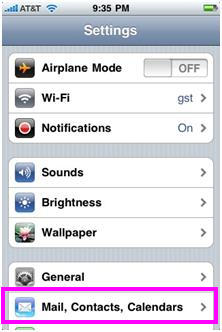
2. Under Settings, select Mail, Contacts, Calendars.
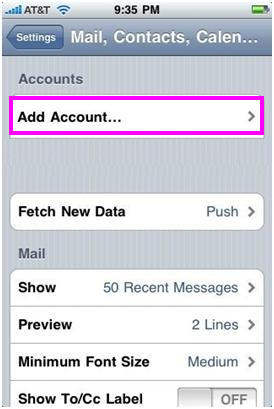
3. Select Add Account…
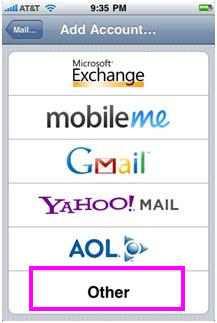
4. Select Other as the type of account.
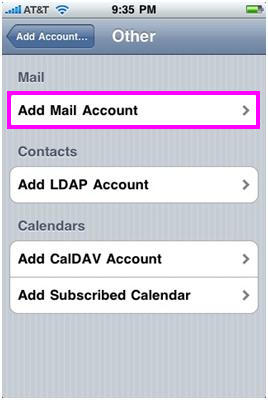
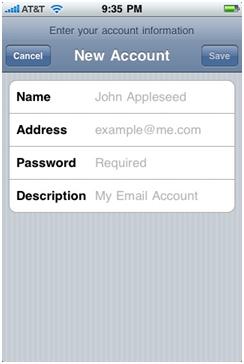
6. Enter the requested information:
Address: the email address of the mail user
Password: enter the users password (incoming mail server and external mail server)
Description: a description of the mail user
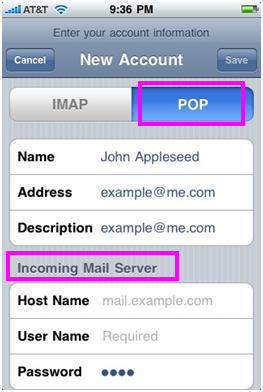
8. Click POP and enter the Incoming Mail Server information:
User Name: enter the full email address
Password: enter the users password
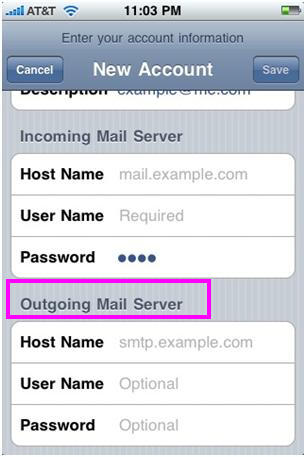
Host Name: enter the mail server address
User Name: enter the full email address
Password: enter the users password
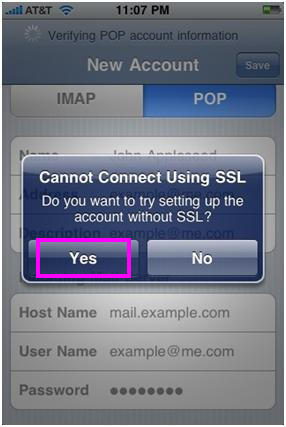
11. If you see a message that says “Cannot Connect Using SSL”, click Yes when asked to setup the account without SSL. The account should setup and verify.
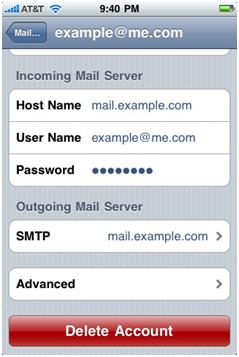
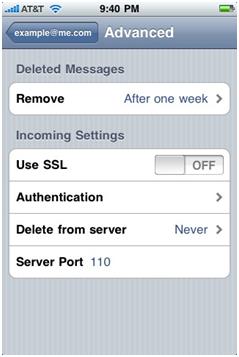
12. Go to the settings for the account. The Advanced settings for the account will be displayed and do not need to be changed unless there are issues or you wish to change the defaults (how long messages stay on server, how often to delete messages in Deleted Items, etc).
Mua và Đăng ký Tên miền .COM của bạn ngay hôm nay
Kiểm tra tính khả dụng của tên miền .COM, đăng ký tên miền .COM mới, tìm kiếm nhiều tên trong số lượng lớn, hoặc chuyển các tên miền .COM hiện có sang NiceNIC. Được thiết kế cho doanh nghiệp, nhà đầu tư tên miền, đại lý, nhà cung cấp dịch vụ lưu trữ và đại lý bán lại.
Tin tiếp theo: China Enterprise Email Market in 2011


