


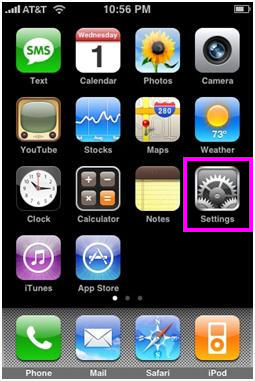
1. From the Dashboard, click Settings.
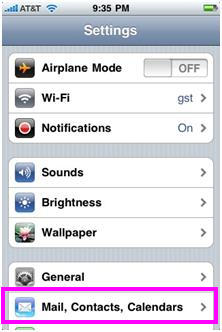
2. Under Settings, select Mail, Contacts, Calendars.
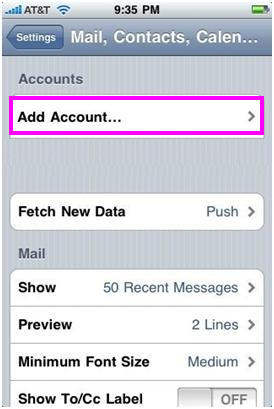
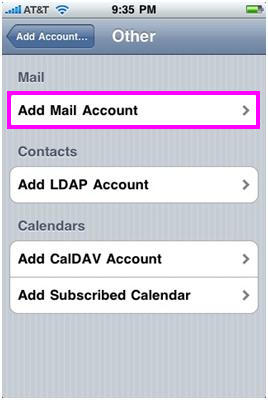
3. Select Add Account…
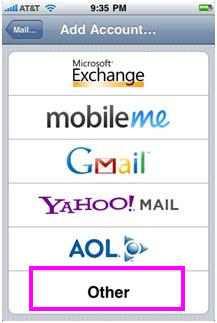
4. Select Other as the type of account.
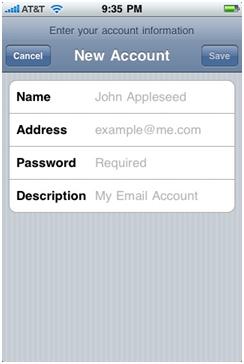
6. Enter the requested information:
Address: the email address of the mail user
Password: enter the users password (incoming mail server and external mail server)
Description: a description of the mail user
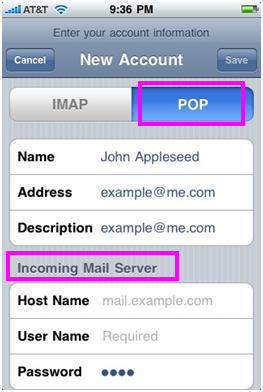
8. Click POP and enter the Incoming Mail Server information:
User Name: enter the full email address
Password: enter the users password
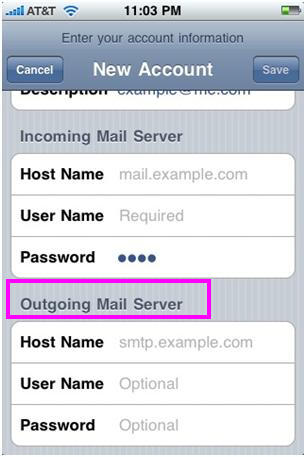
Host Name: enter the mail server address
User Name: enter the full email address
Password: enter the users password
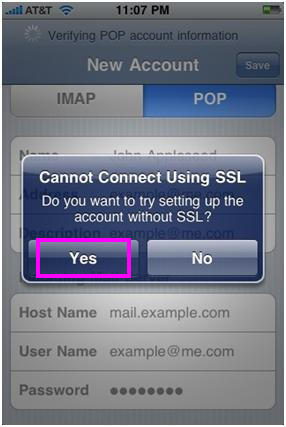
11. If you see a message that says “Cannot Connect Using SSL”, click Yes when asked to setup the account without SSL. The account should setup and verify.
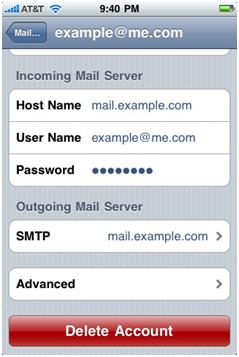
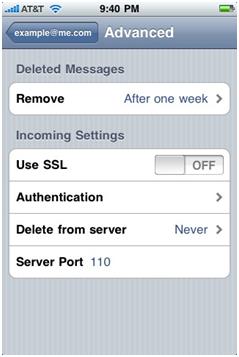
12. Go to the settings for the account. The Advanced settings for the account will be displayed and do not need to be changed unless there are issues or you wish to change the defaults (how long messages stay on server, how often to delete messages in Deleted Items, etc).
今日中に.COMドメインを購入して登録しましょう
.COMドメインの空き状況を確認し、新しい.COMドメインを登録し、一括で複数の名前を検索したり、既存の.COMドメインをNiceNICに移管したりできます。ビジネス、ドメイン投資家、代理店、ホスティングプロバイダー、リセラー向けに作られています。


