


NiceNIC WHMCS Integration Setup Guide
The NiceNIC WHMCS registrar module connects WHMCS domain orders with supported NiceNIC registration, renewal, transfer and management operations. This guide covers installation of the official module; first confirm which published package fits your WHMCS environment.
Official download and installation source: NiceNIC WHMCS Registrar Module.
Requirements
- An operating WHMCS installation with administrator and server-file access.
- A current backup of WHMCS files, database and any existing registrar module.
- A NiceNIC account with Domain API access, its API Secret, and the public outbound IP of the WHMCS server.
- PHP, cURL, TLS and ionCube meeting the requirements for your installed WHMCS version.
Version note (October 2026): NiceNIC advertises support for the WHMCS 9.0 release line and provides a standard module and a WHMCS V8+ package. Support for WHMCS 9.0 does not mean both packages work in every existing installation; select the appropriate package and test it on staging first. Market and Reseller Accounts can use Domain API v2, while reseller tiers determine pricing. NiceNIC's WHMCS onboarding is aimed at domain resellers.
Install NiceNIC in WHMCS
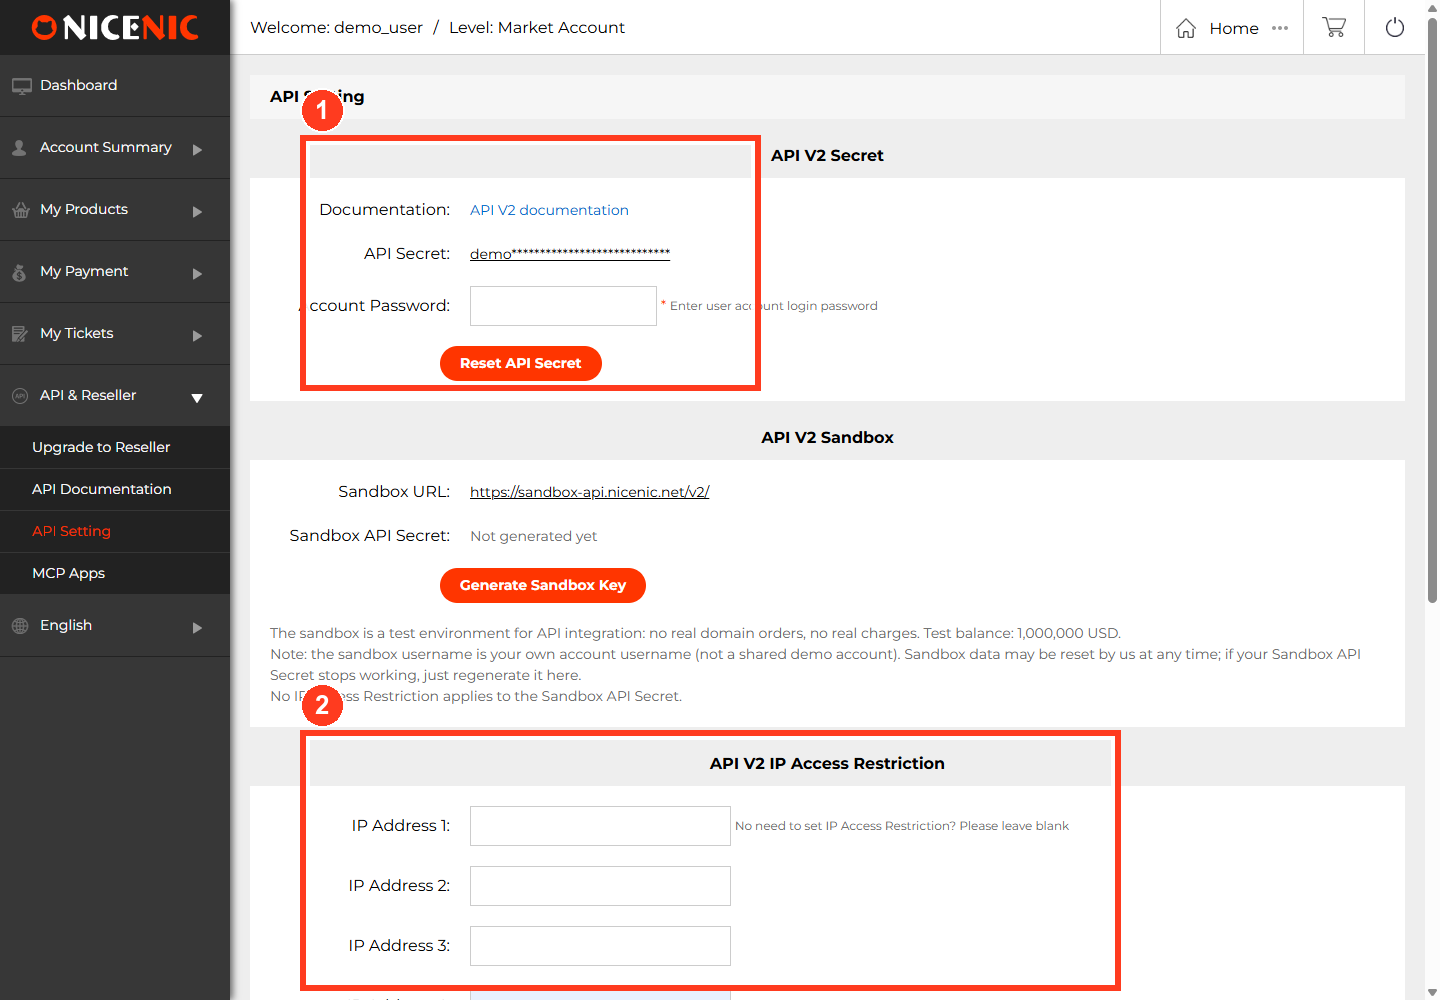
- Sign in to NiceNIC and open API Settings to retrieve or generate your API Secret. Authorize the actual public egress IP used by the WHMCS server if IP authorization is required.
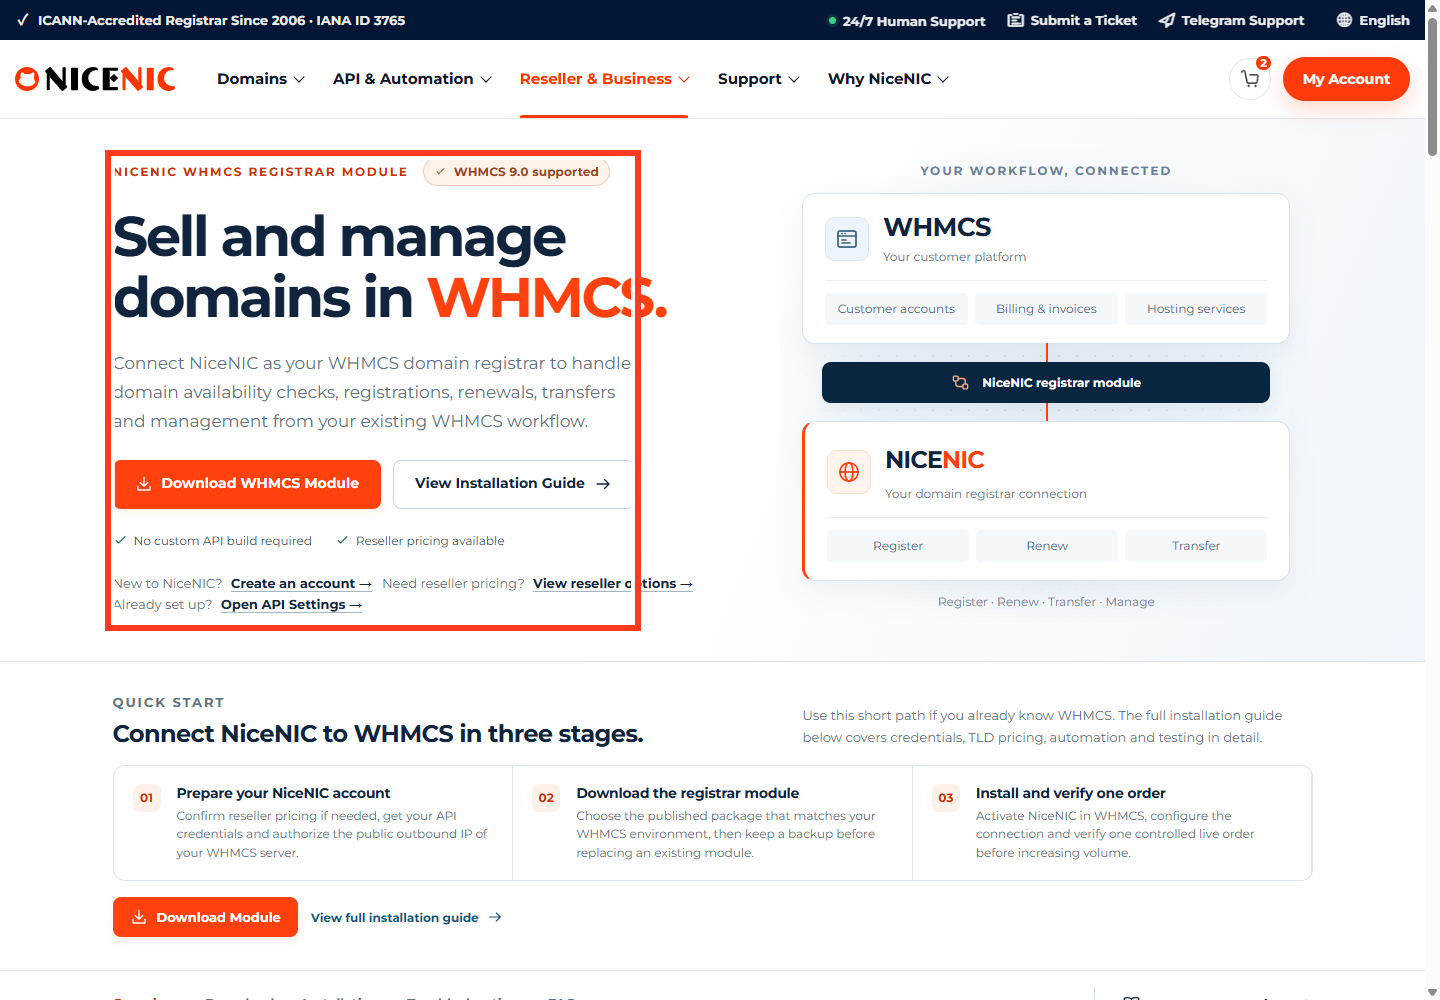
- Download the approved WHMCS module package from the official integration page. Keep its release notes and take a backup before replacing an old module.
-
Extract the package. Place the
nicenicfolder inside WHMCS's registrar module directory without an extra nested level:
/path/to/whmcs/modules/registrars/nicenic/
- In WHMCS 9.0, navigate to Configuration → System Settings → Domain Registrars; find NiceNIC and click Activate. Menus may differ in older supported WHMCS releases.
- Configure the NiceNIC module with the NiceNIC username and API Secret—not your website login password. Keep secrets in the server-side module configuration.
- In WHMCS Domain Pricing, assign NiceNIC as registrar for the TLDs you intend to sell. Set registration, renewal and transfer retail prices separately, in your selling currency.
- Confirm the WHMCS cron/automation setup and reconcile the available NiceNIC account balance before enabling chargeable operations.
Test before accepting customer orders
First test a read-only availability or account lookup and review the WHMCS module log. Then place one deliberately authorized live order, verify the NiceNIC transaction and registry result, and check that the WHMCS customer order reflects the outcome.
Do not assume WHMCS "Test Mode" equals NiceNIC's API Sandbox. The sandbox is a separate API environment; the module's Test Mode behavior depends on the installed package. Do not send an unexpected paid operation while testing.
Common errors
For API response codes, see NiceNIC Domain API v2. Keep sensitive credentials out of screenshots and tickets.


