


Outlook 2007
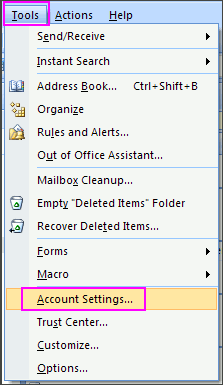
1. In Outlook 2007, from the Tools menu, select Account Settings...
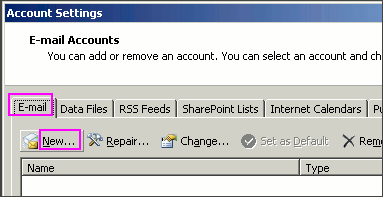
2. On the E-mail tab, click New...
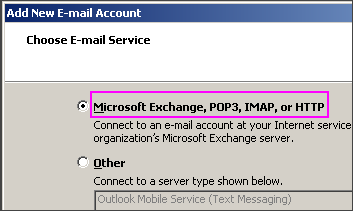
3. Select Microsoft Exchange, POP3, IMAP, or HTTP and click Next.
4. Check Manually configure server settings or additional server types and click Next.

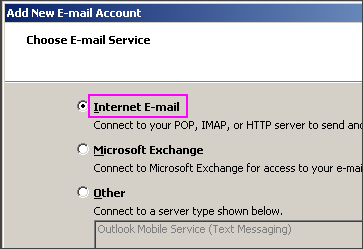
5. Select Internet E-mail and click Next.
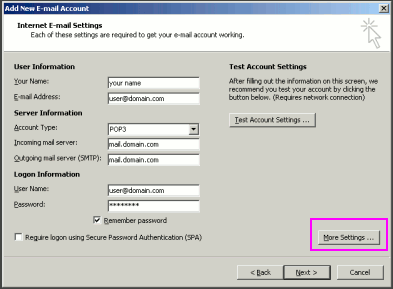
* Your Name: your name
* Email Address: the email address the messages will be sent from
* Account Type: POP3
* Incoming Mail server: mail.domainname.xyz
* Outgoing Mail server: mail.domainname.xyz
* User Name: the full email address
* Password: the password for the email address
7. Click More Settings...
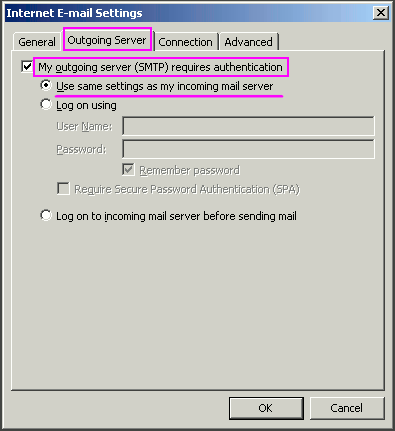
8. On the Outgoing Server tab, check My outgoing server (SMTP) requires authentication.
9. Select Use same settings as my incoming mail server and click OK.
10. Click Test Account Settings to verify everything is configured correctly.
11. Click Next and then click Finish.
Outlook
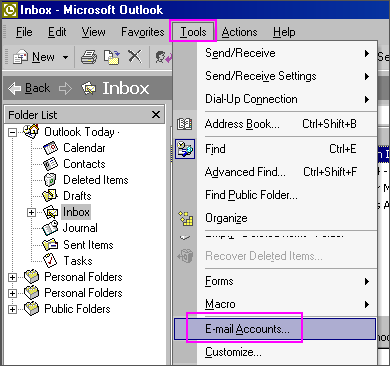
1. In Outlook, from the Tools menu, select Email Accounts...
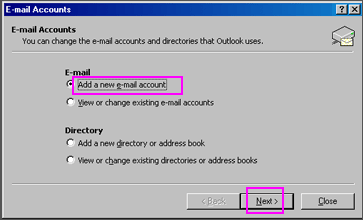
2. Select Add a new e-mail account and then click Next.
3. Select POP3 and then click Next.
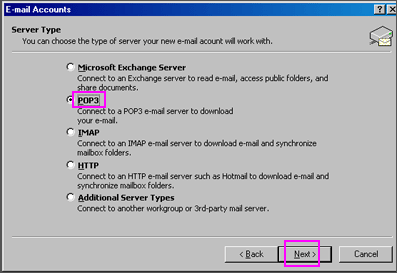
* Your Name: your name
* Email Address: the email address the messages will be sent from
* Incoming Mail server (POP3): mail.domainname.xyz
* Outgoing Mail server (SMTP): mail.domainname.xyz
* User Name: the email address used to log into the webmail interface
* Password: the password for the email address
5. Click on More Settings... and select the Outgoing Server Tab.
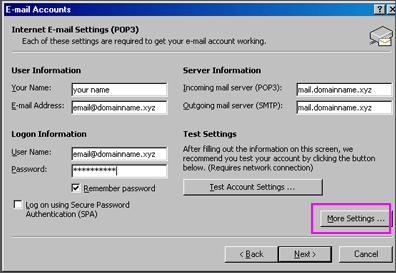
7. Select Use same settings as my incoming mail server.
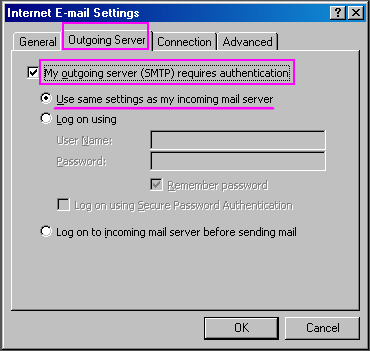
8. Click OK. Click Next. Click Finish.
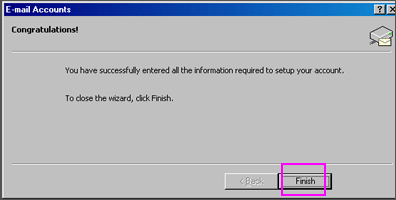
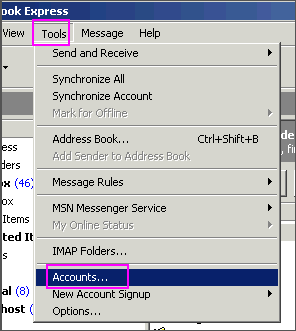
1. In Outlook Express, from the Tools menu, select Accounts…
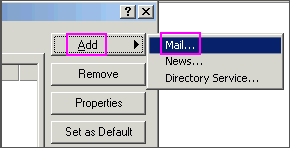
2. A box will appear. Click Add and select Mail...
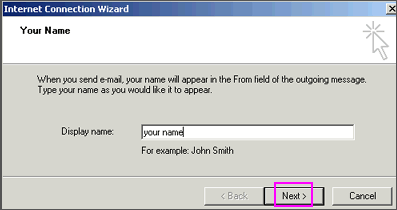
3. Enter your name as you want it to appear on your emails and click Next.
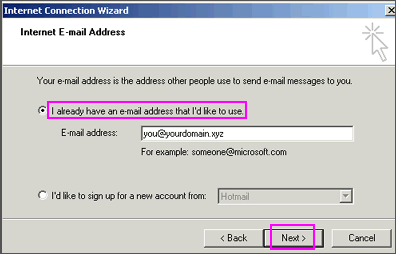
4. Put in your email address, which consists of a user you set up in webmail and @yourdomain.xyz, and then click Next.
5. Set the server type as POP3.
6. For incoming and outgoing mail servers, enter mail.yourdomain.xyz (where yourdomain.xyz is your domain name and extension such as .com).
7. Click on Next.
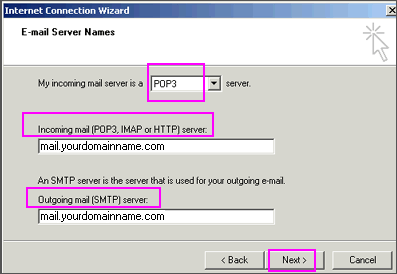
Note: Do NOT check the box “Log on using Secure Password Authentication”.
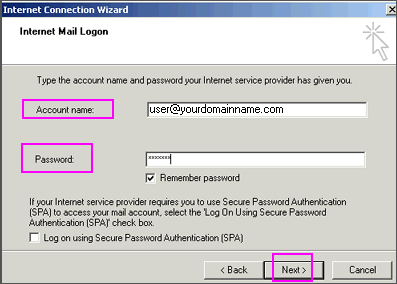
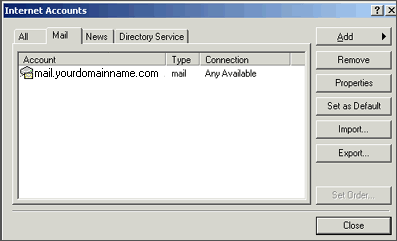
9. Click Next and then click Finish. After you click Finish, you should see the following window. If not, go to the Tools menu, and click on Accounts. After clicking Accounts the window will appear. In this window, click on your domain until it is highlighted, then click on Properties.
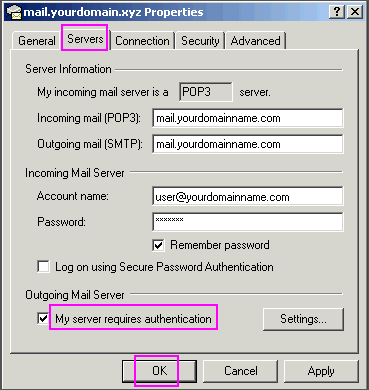
10. When the next screen appears, click on the Servers tab. Under Outgoing Mail Server, check the box next to My server requires authentication. Click OK.
Note: You MUST do this step so you can send mail from your domain.
11. Now, you’re ready to send and receive mail. To set up multiple accounts, follow these steps again.
오늘 .XYZ 도메인을 구매하고 등록하세요
.XYZ 도메인 가용성을 확인하고, 새 .XYZ 도메인을 등록하며, 여러 이름을 일괄 검색하거나 기존 .XYZ 도메인을 NiceNIC으로 이전하세요. 기업, 도메인 투자자, 에이전시, 호스팅 제공자 및 리셀러를 위해 설계되었습니다.
다음 뉴스: Configure Android for NiceNIC POP Email Accounts


